Carpet tiles are a versatile and cost-effective solution for many homeowners and business owners looking to install new flooring. Whether you’re renovating a room, office, or even an entire building, installing carpet tiles can transform your space. The beauty of carpet tiles lies in their easy installation, minimal maintenance, and the ability to replace individual tiles without overhauling the entire floor.
Installing carpet tiles is a simple and cost-effective project that you can do yourself. With the right materials, preparation, and a little time, you can get professional results without hiring a contractor.
In this guide, we’ll walk you through the entire process of how to install carpet tiles, from preparation to finishing touches. This is the perfect solution if you’re looking for a straightforward, DIY-friendly project to enhance your home or office.
Advantages of Using Carpet Tiles
Why should you choose carpet tiles over traditional carpets? Carpet tiles are an increasingly popular choice for homeowners and businesses due to their flexibility, durability, and ease of installation. Here are the key advantages:
- Easy Installation: Carpet tiles are designed to be installed by anyone, even if you’re new to DIY projects. You don’t need professional tools, and there’s no need for glue or nails, as most tiles have adhesive backing.
- Cost-Effective: Carpet tiles are often more affordable than traditional carpeting. Plus, since you can replace individual tiles if they get damaged, it can save you money in the long run.
- Versatility: In various colors, patterns, and textures, carpet tiles allow you to create a unique, custom look. Whether you prefer a bold design or a subtle tone, carpet tiles allow you to express your style.
- Durability: Carpet tiles are ideal for high-traffic areas as they are designed to withstand daily wear and tear. Many types are stain-resistant and moisture-resistant, making them a great choice for homes, offices, and commercial spaces.
- Easy Maintenance: One of the biggest advantages is that you don’t have to replace the entire carpet if a tile gets stained or damaged. Simply swap out the damaged tile for a new one.
Tools and Materials Needed for Carpet Tile Installation
Before beginning your carpet tile installation, gathering the right tools and materials is important. This ensures a smooth and efficient process.
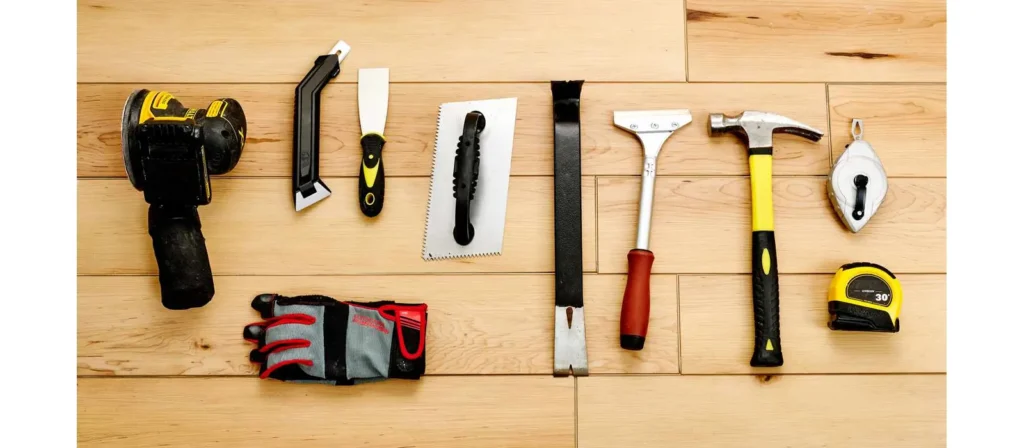
Tools
- Utility Knife: A sharp knife is essential for cutting tiles during carpet tile installation.
- Measuring Tape: Accurate measurements are critical when calculating the carpet tile installation cost and ensuring you have enough tiles.
- Ruler or Straightedge: Essential for making straight cuts when trimming tiles.
- Chalk Line: A chalk line will help you mark the center of the room and maintain straight alignment.
- Carpet Roller (Optional): This tool presses the tiles into place, ensuring no air bubbles and that the tiles are securely adhered to the floor.
- Notched Trowel: Use a notched trowel to evenly spread adhesive for a monolithic or ashlar carpet tile installation.
Materials
- Carpet Tiles: Choose tiles that are appropriate for your space. You’ll find options for monolithic carpet tile installation, which gives a sleek and uniform appearance, or other pattern patterns like ashlar carpet tile installation.
- Adhesive: Use carpet adhesive to bond the tiles to the subfloor for tiles without adhesive backing.
- Underlay (Optional): Some floor types may require an underlayment for extra protection.
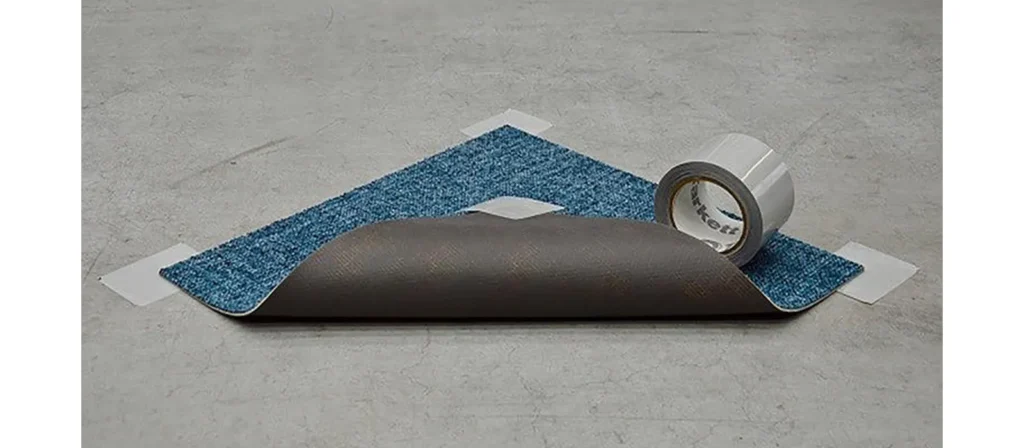
- Seam Tape: Useful for joining edges when installing carpet tiles.
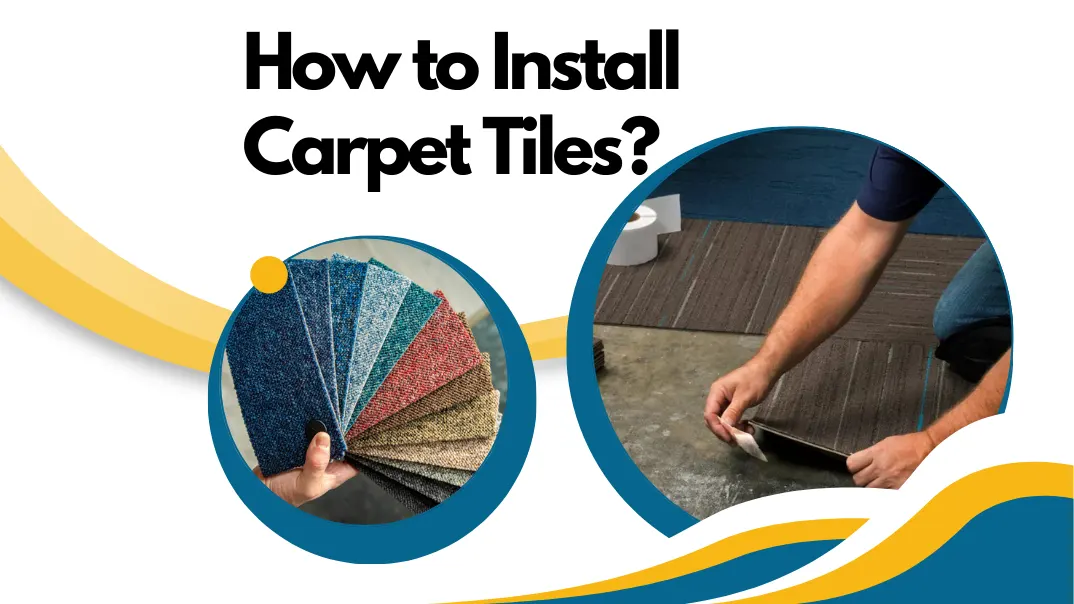
How Do I Install Carpet Tiles?
Installing carpet tiles is a highly accessible and rewarding project that almost anyone can handle. It’s perfect for those looking to upgrade their floors without hiring professionals. The process involves careful planning, precision, and the right tools, but with the right guidance, you can achieve fantastic results.
Whether you choose the monolithic carpet tile installation pattern, the ashlar carpet tile installation design, or any other pattern, following these steps will help you achieve a flawless result.
Step 1: Calculate the Materials Needed
Before starting, calculate how many carpet tile installation materials you’ll need. This will prevent you from purchasing too many or too few tiles.
- Measure the Room: Measure the length and width of your room. Multiply these two measurements to determine the total square footage.
- Factor in Waste: Carpet tiles are often cut to fit around edges, corners, and obstacles, so it’s a good idea to add around 10% to the total area to account for waste. This ensures you don’t run out of tiles before finishing the job.
- Check Tile Size: Carpet tiles typically come in standard sizes, such as 18″x18″ or 24″x24″. Based on the tile size, you’ll need to calculate how many tiles fit into the total square footage of your room. For example, a room 10 feet by 12 feet (120 square feet) will require 40 tiles if each tile is 12″x12″.
- Consider Installation Method: Different carpet tile installation methods may require more or fewer tiles. For instance, if you use a 1-4 turn carpet tile installation, the layout may involve more tile cutting than a monolithic or ashlar carpet tile installation, so adjust accordingly.
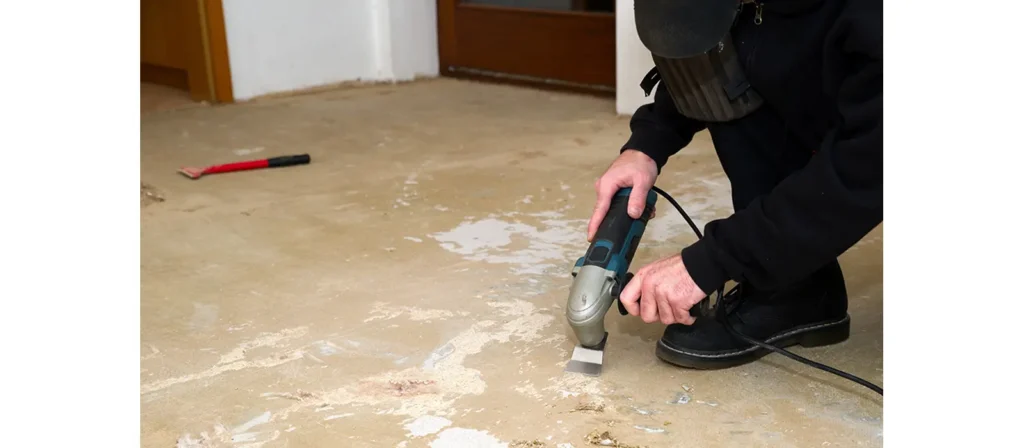
Step 2: Prepare the Area
Proper preparation is key to ensuring your carpet tile installation goes smoothly. Here’s how to get your space ready:
- Remove Furniture: Clear the room of all furniture to give yourself plenty of space for installing carpet tiles. It will also prevent any accidental damage to your new tiles.
- Remove Old Flooring: If any existing flooring, such as carpet or tile, is removed to create a smooth, clean surface for carpet tile installation. This will help the adhesive bond better.
- Fill Cracks: Inspect the subfloor for any cracks or holes. If you find any, patch them up to ensure an even surface for your install carpet tiles.
- Clean the Surface: Dust and dirt can affect adhesive performance, so clean the floor thoroughly before starting carpet tile installation.
- Measuring the Room: Take accurate measurements to ensure you purchase enough carpet tiles. This will help prevent over-ordering or under-ordering, which can affect the carpet tile installation cost.
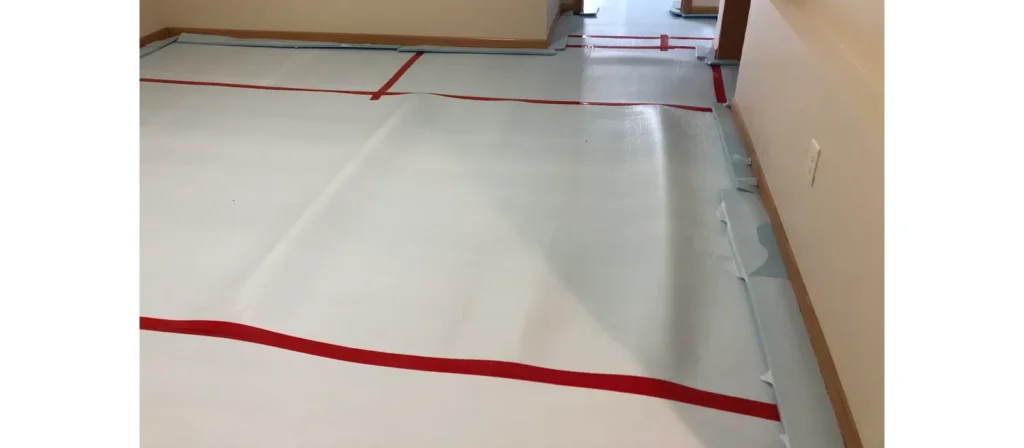
- Seal the Subfloor: If you’re installing carpet tiles over tile or a porous subfloor, apply a suitable sealant to protect the adhesive and prevent moisture from seeping in.
Step 3: Mark the Center of the Room
You must find the center of the room to ensure your tiles are symmetrically and correctly aligned.
- Find the Center: Use a measuring tape or ruler to measure the width and length of the room. Mark the midpoint on both sides of the room and draw a chalk line across each axis. Where the two lines intersect will be the center of your room.
- Use a Square Tool: To ensure that your lines are perfectly straight and at right angles, use a carpenter’s or framing square. This step is crucial for install carpet tiles in straight, even rows, using the monolithic carpet tile installation method or an alternative pattern.
Step 4: Plan the Layout
Planning your carpet tile installation patterns will help you determine how to arrange the tiles for an attractive and efficient installation. Here’s how to plan the layout:
- Choose Your Installation Pattern: There are several common carpet tile installation patterns you can use:
- Monolithic: In this layout, all the tiles are laid in the same direction. This gives a uniform, seamless appearance.
- Ashlar: This pattern involves laying tiles in alternating rows that are offset. It creates a more dynamic look and is often used in commercial settings.
- 1-4 Turn: Each tile is rotated 90 degrees in this pattern, so it looks like a traditional checkerboard design. It is popular for creating visual interest and texture.
- Dry Fit the Tiles: Before attaching them with adhesive, lay them out in your chosen pattern. Start from the center and work your way out. This step helps you visualize the pattern and ensures tiles fit without excessive cutting.
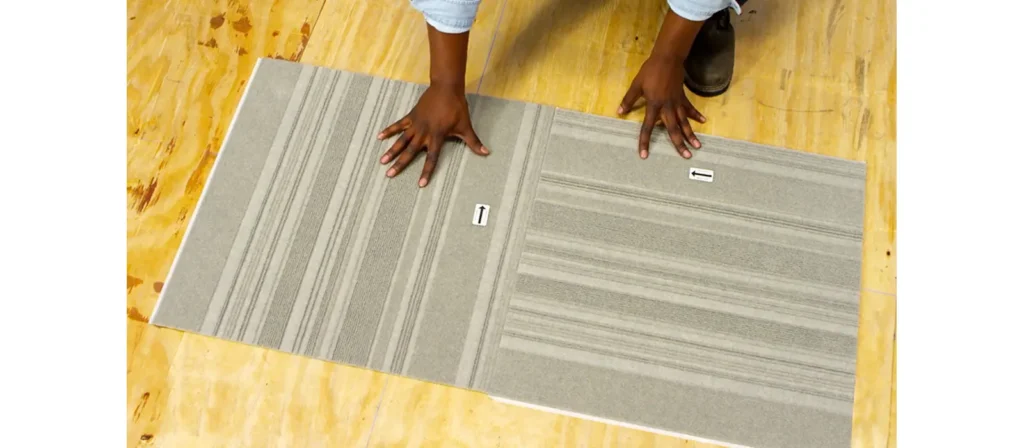
- Consider Directional Tile Designs: Some carpet tiles have directional patterns (like stripes). Ensure that you align all tiles in the correct direction before securing them.
Step 5: Install the Carpet Tiles
Now that you’ve planned your layout and ensured everything is in place, it’s time to install carpet tiles.
- Start in the Center: Begin in the center of the room, where your lines intersect. This ensures that your tiles are evenly distributed throughout the room and prevents any awkward cuts at the walls.
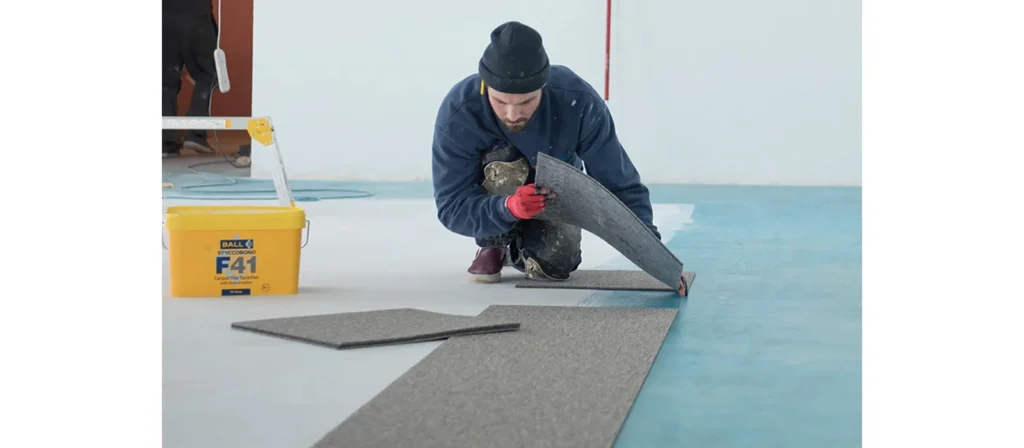
- Apply Adhesive: Applying adhesive to the floor or the back of the tiles depends on your chosen installation method. If you’re using glue-down carpet tile installation, spread the adhesive evenly with a notched trowel. Simply remove the backing and press them firmly into place for peel-and-stick tiles.
- Press Tiles into Place: As you lay each tile, press it firmly into the adhesive. Use a carpet roller to roll over the tiles to ensure they are well-bonded and have a smooth surface. This step is important for achieving a professional-quality carpet tile install.
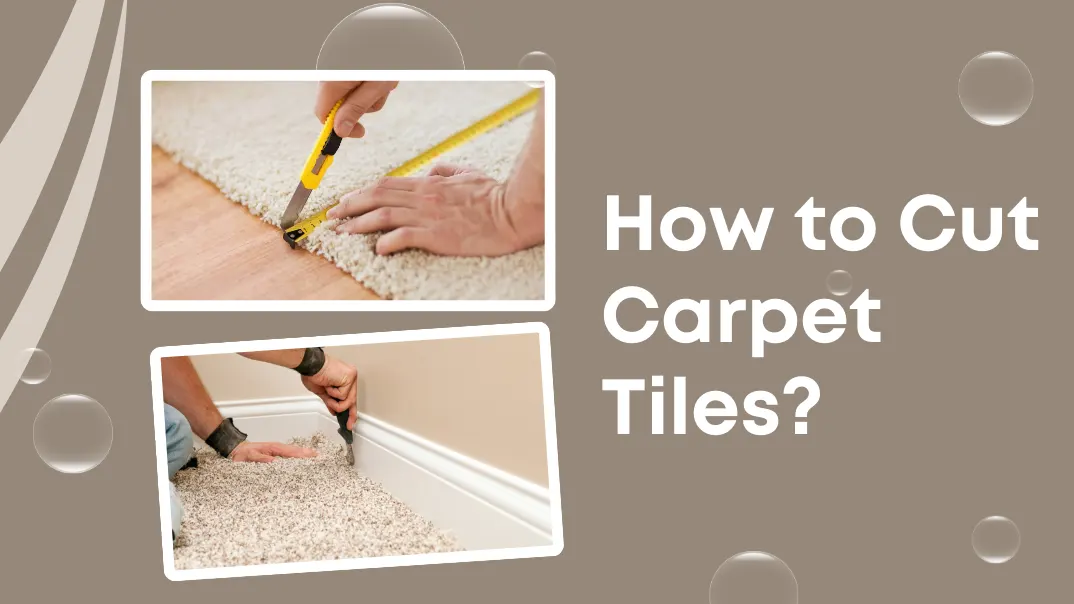
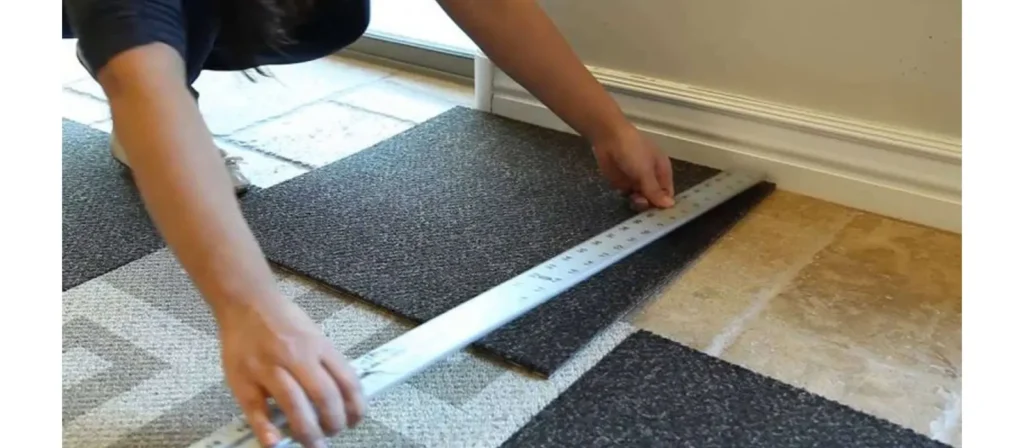
Step 6: Trim the Carpet Tiles
As you approach the room’s edges, you must trim some tiles to fit. Use a utility knife or a carpet cutter to trim the tiles to the correct size carefully. Here’s how to do it:
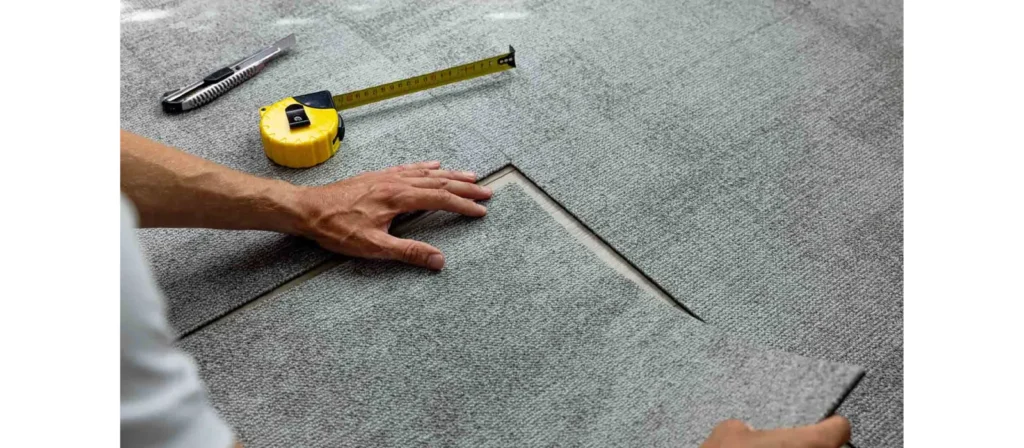
- Measure and Mark: Measure the space between the last full tile and the wall. Mark the dimensions on the tile you need to trim.
- Cut the Tile: Score along the marked line using the utility knife. Apply gentle pressure, then snap the tile along the scored line. If you need to cut a tile into more complex shapes (for instance, around corners or fixtures), make precise cuts using the utility knife and a ruler.
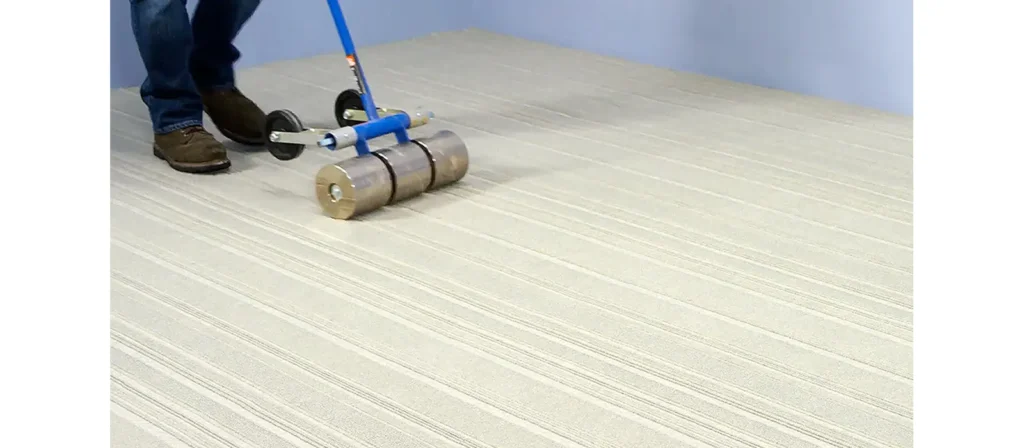
Step 7: Use a Carpet Roller
Once the tiles are laid and aligned, press them down firmly onto the subfloor with a carpet roller. The roller helps eliminate air pockets and ensures the tiles are securely adhered to the floor. Roll over the entire area, working in small sections to apply even pressure.
This step is especially important for tiles with adhesive backing, but it can also help with glue-down tiles to ensure maximum adhesion.
Step 8: Allow the Adhesive to Set
Allowing the adhesive to set is essential if you’re using an adhesive method for carpet tile installation. Follow the manufacturer’s instructions on how long to wait before walking on the newly installed floor. Typically, you should allow 24-48 hours for the adhesive to cure fully.
Avoid placing heavy furniture or objects on the floor during this time to ensure the tiles bond correctly.
Step 9: Clean the Surface
Once the adhesive has set and the tiles are firmly in place, give the floor a final clean. Vacuum up any dust or debris from the installation process. Wipe the tiles with a damp cloth to remove any remaining adhesive residue.
Your newly installed carpet tiles are now ready to be used!
Different Ways to Install Carpet Tiles
There are several methods for installing carpet tiles, each offering a unique approach depending on your needs and preferences. Below is a comparison of different carpet tile installation methods:
| Installation Method | Description |
|---|---|
| Glue-Down Method | A permanent installation method that uses adhesive to attach carpet tiles to the subfloor. |
| Peel-and-Stick | An easy DIY method where the backing of the carpet tile has adhesive, making it perfect for a simple easy install carpet tiles solution. |
| Loose-Lay Method | Tiles are laid without adhesive, relying on the weight of the tiles to hold them in place. |
| Click-Together | Tiles with interlocking edges that click into place without adhesive, offering an easy-to-install, removable option. |
| Ashlar (Brick Pattern) | Tiles are staggered like a brick wall, providing a dynamic look and hiding seams. Commonly used for commercial spaces. |
| 1/4 Turn (Quarter Turn) | Tiles rotated 90 degrees to create a bold, dynamic pattern. Ideal for making a statement in any room. |
How to Lay Carpet Tiles?
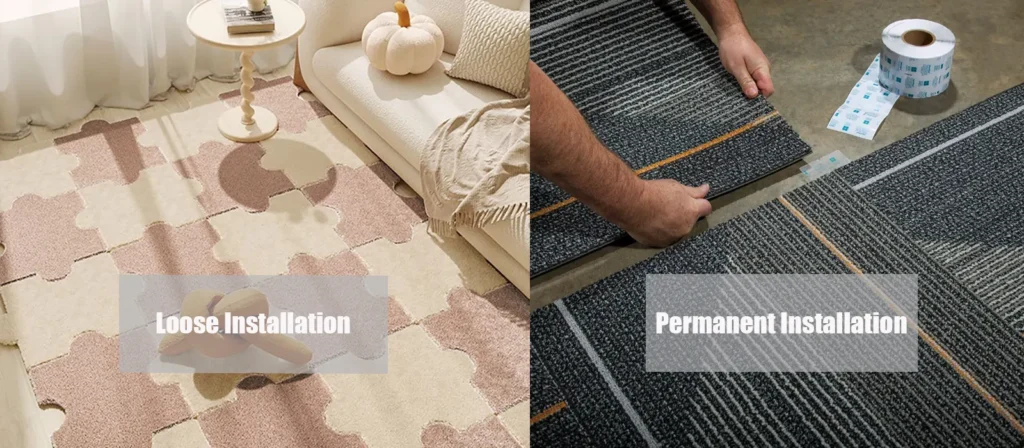
When it comes to laying carpet tiles, the first thing to determine is the type of installation method you want to use. There are two primary options: loose installation and permanent installation. Both methods have their advantages and best-use scenarios. Let’s explore each in detail to help you decide which is right.
Loose Installation
Loose installation is the more flexible option, where the carpet tiles are laid without using any adhesive. Instead, the tiles rely on their weight and the friction between the tiles to stay in place. This method is typically used in areas where you may want to replace the tiles later without much hassle, such as in rented spaces or offices where the floor needs to be regularly updated.
- Pros: Easy to install and remove, ideal for temporary or rental spaces. No need for adhesive, making it cleaner and faster.
- Cons: Less stable than permanent installations and may shift over time, especially in high-traffic areas.
Permanent Installation
For a more durable and long-lasting installation, the permanent installation uses adhesive to bond the carpet tiles to the subfloor. This method is ideal for spaces with a lot of foot traffic, such as offices, retail spaces, or high-traffic rooms in your home.
- Pros: Provides a secure, permanent bond that is more stable and less likely to shift over time.
- Cons: Requires more preparation and time to install, and the adhesive can make it more difficult to remove tiles if you want to change them later.
Tips for Installing Carpet Tiles
While installing carpet tiles is straightforward, there are a few tips to ensure your installation is as smooth and professional-looking as possible. These simple but effective tips will help you achieve the best results.
1. Choose the Right Adhesive
Using the proper adhesive is crucial for the durability and effectiveness of your carpet tile installation. The adhesive you choose will depend on several factors, such as the subfloor type, the type of carpet tiles you’re using, and whether you opt for permanent or loose installation.
- For Permanent Installation: Use a strong, high-quality carpet adhesive compatible with your tiles. Look for products specifically designed for carpet tile installation. This will ensure a lasting bond and will help prevent tiles from shifting.
- For Loose Installation: If you use interlocking tiles that don’t require adhesive, choose tiles with non-slip backing. However, some people use a light adhesive or double-sided carpet tape to hold the tiles in place for added security.
2. Maintain Proper Alignment
Maintaining proper alignment is one of the most critical steps in installing carpet tiles. Even a slight misalignment can make the whole installation look unprofessional, and it can be especially noticeable with patterned tiles.
- Use a Chalk Line: To align your tiles, use a chalk line to create straight reference lines. This will help ensure all tiles are placed in a uniform pattern, whether opting for a monolithic tile installation or a more intricate design.
- Check Alignment Frequently: Step back and check the alignment as you lay each tile. If you see any tiles slipping out of place, adjust them before the adhesive sets.
3. Deal with Irregular Spaces
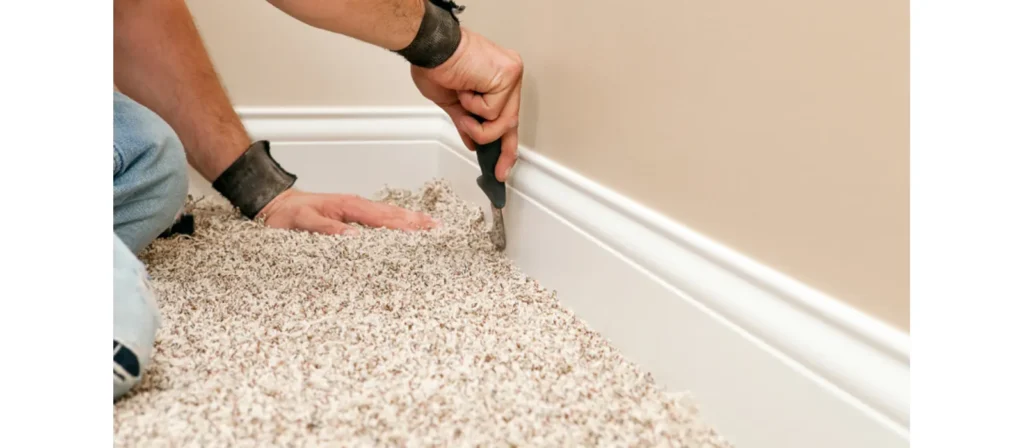
Some rooms may have corners, walls, or other irregular features that make it difficult to lay carpet tiles without gaps or overlaps. Don’t hesitate to trim tiles to fit snugly into these areas when faced with tricky spaces. A utility knife or carpet cutter can carefully shape tiles for a perfect fit.
Carpet Tile Decoration Options
Once you’ve installed your carpet tiles, it’s time to think about the design and decoration. The beauty of carpet tiles is their versatility—you can create almost any look you desire with a few simple adjustments.
Design Patterns
One of the most appealing aspects of installing carpet tiles is the ability to experiment with different design patterns. Some popular options include:
- Monolithic: All tiles are aligned in the same direction, creating a uniform look.
- Ashlar: Tiles are offset in a staggered pattern, creating a dynamic and modern appearance.
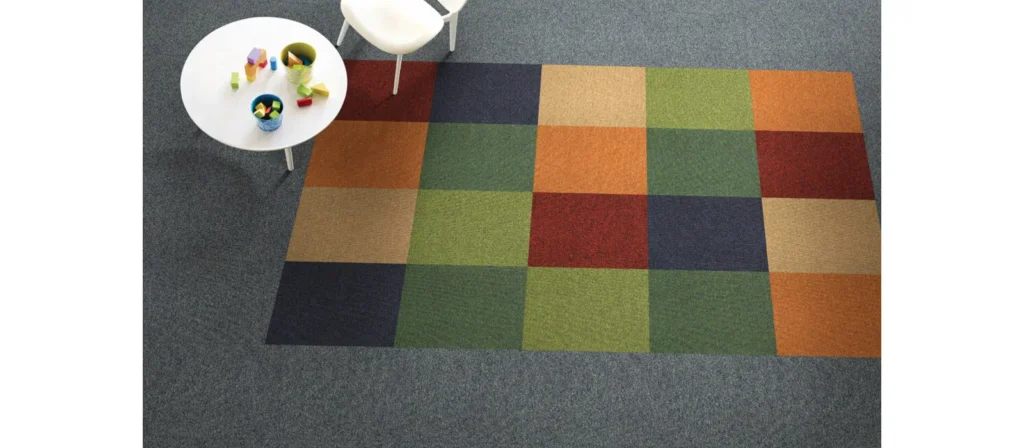
- Checkerboard: Alternating colors and patterns create a striking visual impact.
- Herringbone: A V-shaped pattern that adds a sense of sophistication and elegance.
Material Combinations
You can combine different types of carpet tiles to create unique patterns and textures. Mixing colors or materials can give your floor a custom look.
- Color Combinations: Use complementary or contrasting colors to create a bold statement or subtle sophistication. For instance, a monochrome look with different shades of the same color can create depth without overwhelming the space.
- Textural Combinations: Combine textured tiles with flat ones to create an eye-catching and dynamic design.
Space Division
If you want to install carpet tiles in larger spaces or open-plan areas, consider using the tiles to divide different zones. Carpet tiles can create visual boundaries or separate functional areas, like workspaces or relaxation zones.
- Color Zones: Use colored tiles to distinguish between room areas, such as a lounge area and a workspace. This approach works particularly well in open-plan offices or living areas.
- Pattern Zones: You can use patterns to visually divide sections of a room. For instance, a monolithic design can be used for one area, while a more dynamic quarter-turn pattern is used for another.
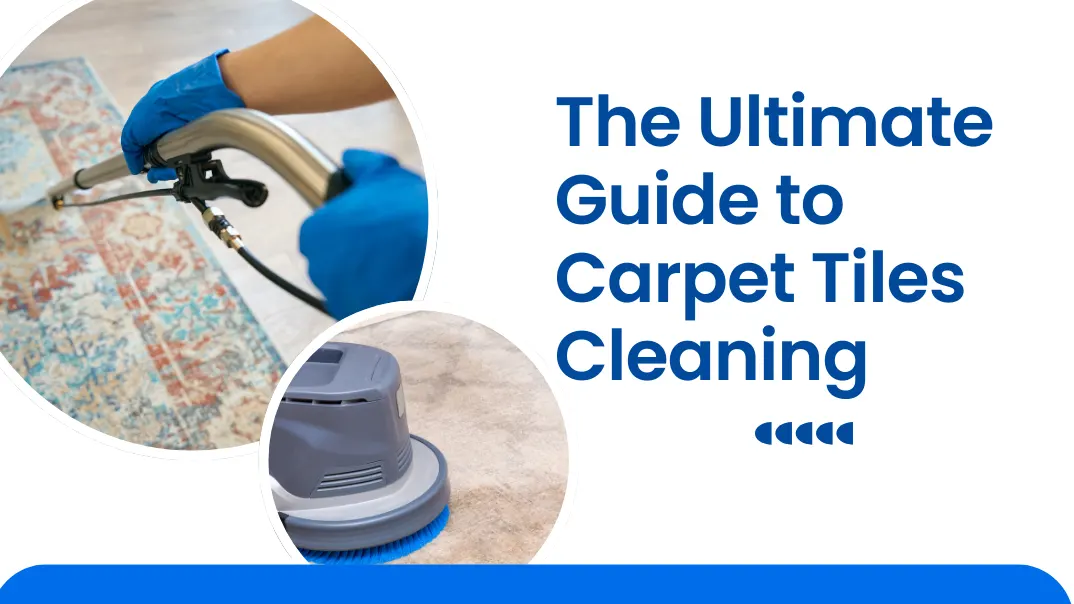
Carpet Tile Care After Installation
After your carpet tile installation is complete, it’s important to care for your new flooring to ensure it lasts and stays looking great. Regular cleaning and maintenance are key to preserving the life of your carpet tiles.
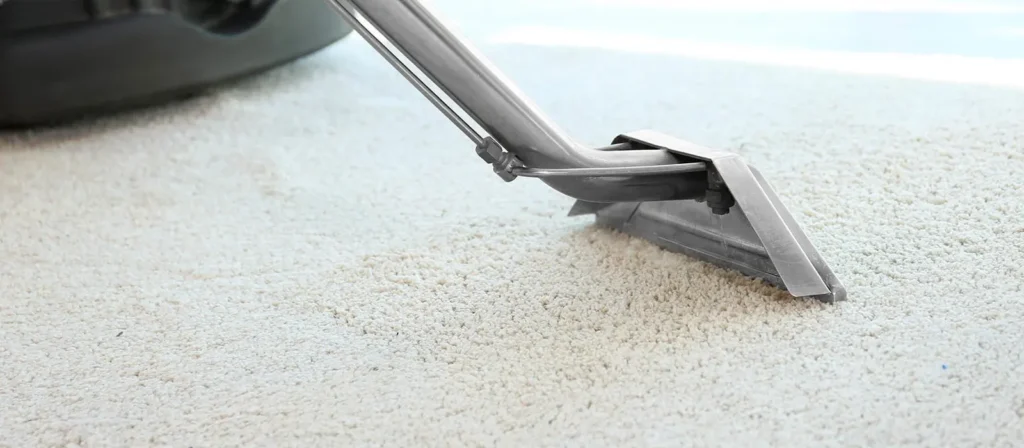
- Regular Vacuuming: Vacuum your carpet tiles regularly to remove dust, dirt, and debris that could damage the fibers or lead to wear.
- Spot Cleaning: For spills or stains, clean the affected area immediately. Blot the spill with a clean cloth, using a mild detergent and water. Avoid scrubbing, as this can damage the tiles.
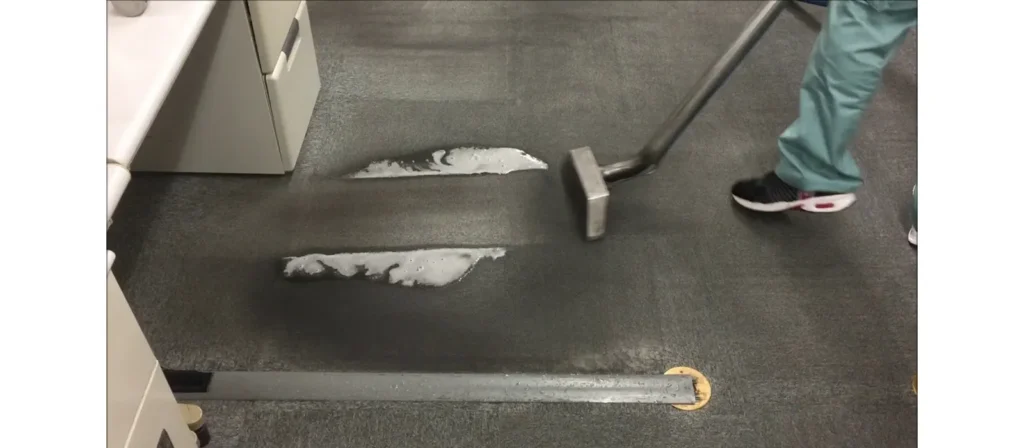
- Deep Cleaning: Periodically, you may want to deep clean your carpet tiles. Many carpet tiles can be cleaned using a commercial or steam cleaner. Be sure to follow the manufacturer’s instructions for cleaning and maintenance.
Staying on top of maintenance will make your carpet tiles look fantastic for years.
Common Mistakes to Avoid During Installation
While installing carpet tiles, it’s easy to make mistakes that can affect the overall appearance and durability of the floor. Here are some common errors and how to avoid them:
- Not Preparing the Subfloor: Failing to clean and prepare the subfloor can lead to tiles not adhering properly, causing them to lift or shift over time.
- Incorrect Adhesive Application: Too much or little adhesive can prevent proper bonding. Always follow the manufacturer’s instructions for adhesive application.
- Misaligned Tiles: Even a small misalignment can be noticeable. Use a chalk line and carefully check the alignment as you work.
- Ignoring the Manufacturer’s Instructions: Each brand and type of carpet tile has its own instructions. Failing to follow these can result in poor installation.
Carpet Tile Installation Video
Conclusion
Installing carpet tiles is a manageable project anyone can do with the right preparation and tools. By following this guide and avoiding common mistakes, you’ll achieve a professional-looking result that will enhance your space. Happy installing!
Frequently Asked Questions (FAQs)
- How much does it cost to install carpet tiles?
The cost of installing carpet tiles varies depending on the type of tile and the area size. On average, you can expect to pay anywhere from $1 to $5 per square foot. - How long do carpet tiles last?
With proper care and maintenance, carpet tiles can last up to 10 years or more, depending on the quality of the tiles and the amount of foot traffic they receive. - Do carpet tiles need underlay?
In most cases, carpet tiles do not require an underlay. However, if your floor is uneven or you want extra cushioning, you can use a carpet underlay. - How to install carpet tiles on concrete?
Clean and level the concrete floor, apply primer if needed, and use a strong adhesive. Lay the tiles from the center outward, pressing them down firmly. - Carpet tile cost per square foot installed?
Installation typically costs between $2 to $6 per square foot, including both materials and labor. - How to install carpet tiles without adhesive?
Use loose-lay installation or self-adhesive carpet tiles that don’t require glue. Simply place the tiles on the clean, dry floor. - How to install carpet tiles without glue?
For a glue-free install, use self-adhesive carpet tiles or opt for loose-lay installation, where tiles stay in place due to their weight and design. - How to install carpet tiles with adhesive?
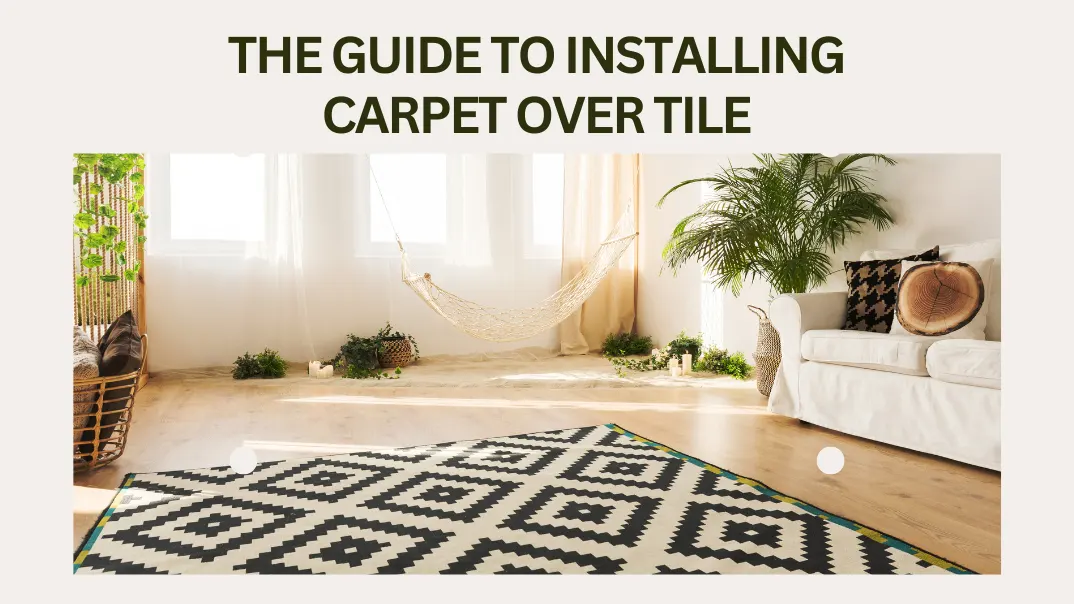
Apply adhesive to the floor, lay the tiles starting from the center, press them down, and use a roller for an even bond. Let the adhesive set as per instructions. - Can I install carpet over tile?
Yes, but ensure the tile is clean, dry, and level. You may need extra adhesive or a carpet underlay to smooth out grout lines. - Are carpet tiles easy to install?
Yes, carpet tiles are easy to install with DIY methods, either using adhesive or loose-lay installation. Proper preparation is key for a professional finish. - Can carpet tiles be installed over carpet?
It’s not recommended, as the underlying carpet can cause the tiles to shift. If necessary, use extra adhesive and ensure the floor is clean and even.